Inside: This post will show you pictures of how to build a snowman with a fun math twist. Dive in for step-by-step instructions and enjoy the photos!
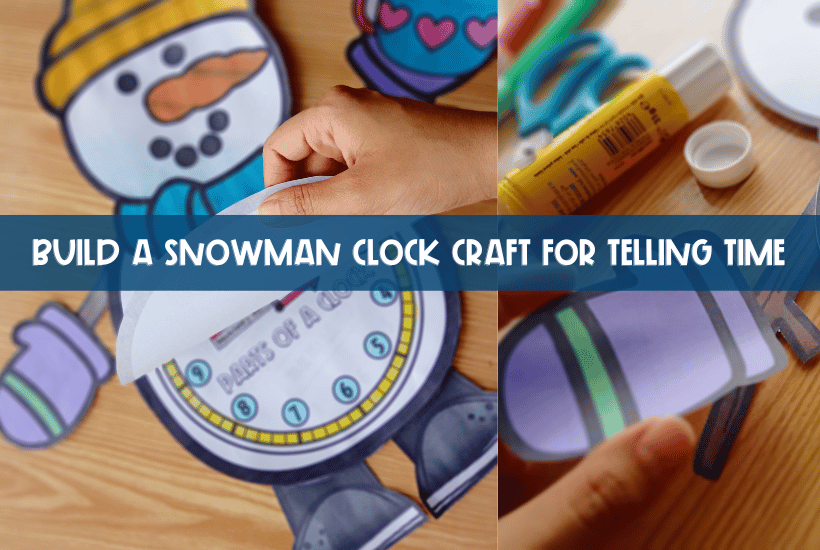
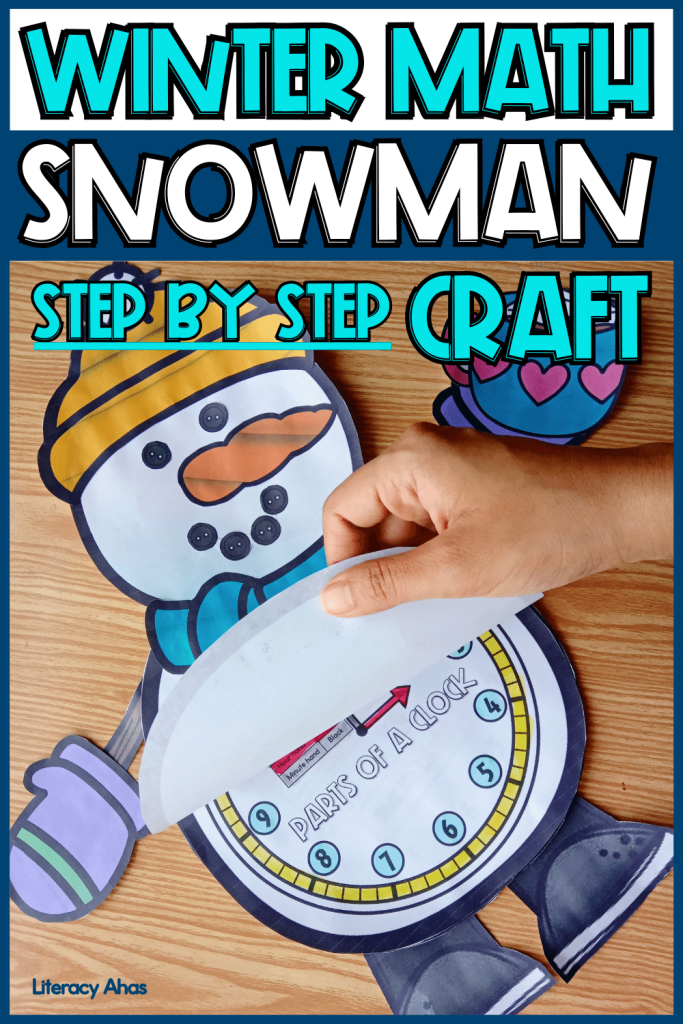
Do you wanna build a snowman AND review telling time with your math students? I love crafting with purpose such as this craft- the kids complete math tasks to earn a snowman craft piece!
This fun activity reviews the following telling time concepts: parts of a clock, how to tell time, telling time to the hour, half hour, five minutes, quarter to or quarter past, am or pm, my daily schedule on the analogue and digital clock, and more.
Related: 5 Winter Activities for Lower Elementary (Fine Motor Fun!)
MATERIALS REQUIRED:
- Build a Snowman Clock Craft Printable Pack
- Tape or Stapler
- Scissors
- Glue stick
- Blue or White Cardboard (optional)
- Pages and Printer
- Pencil/ Colors
STEP BY STEP INSTRUCTIONS
STEP #1: PRINT
You have an option when you print your pages if you want to reduce the number of your tasks.
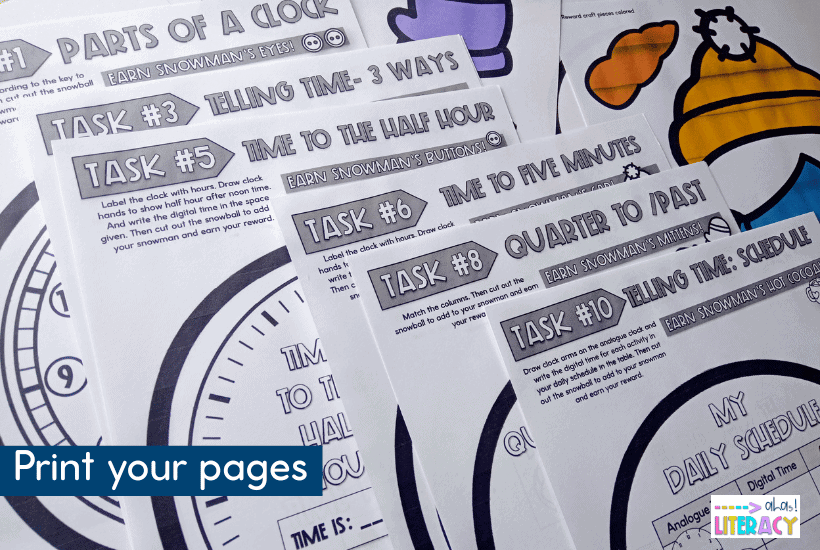
- If you want to do only half of the activities, then you can complete the snowman craft WITHOUT earning any clothing craft pieces. (cap, scarf, mittens, boots, hot chocolate).
- If you want to cover all 10 telling-time topics, then the kids earn the snowman’s body parts (rewards for tasks 1 to 5) ALONGWITH all the clothing items (rewards for tasks 6 to 10).
When printing, you also have the choice to print the colored version of the snowman body parts or use the black and white templates for kids to color and decorate if they have more time.
STEP #2: CUT REWARD PIECES
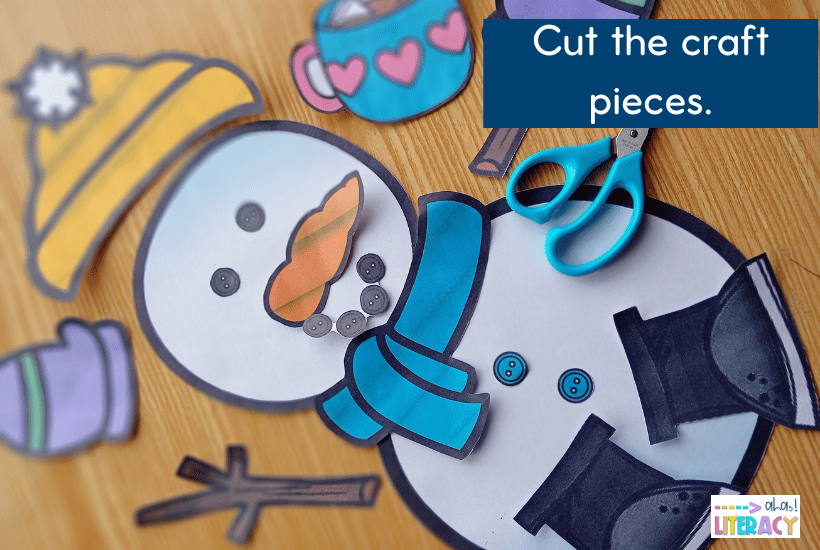
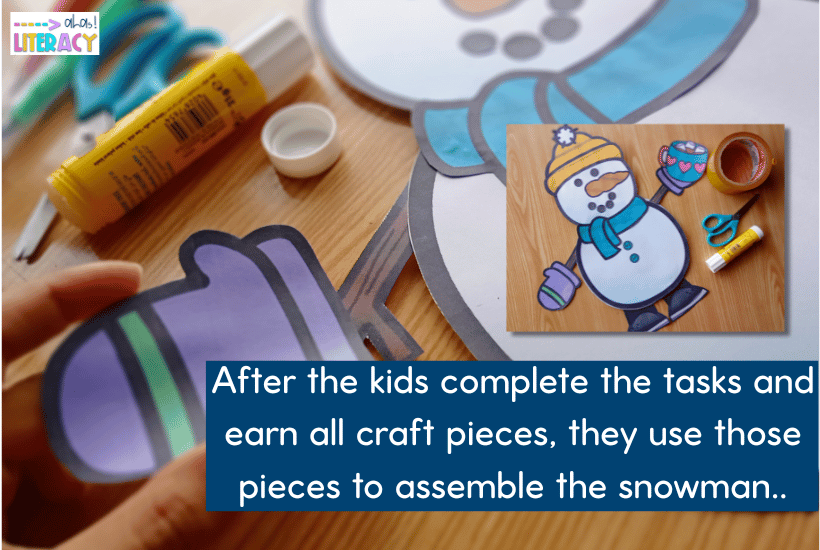
Cut out the craft pieces. These are the rewards for each task the child will complete. You will hand the child a craft piece for each task they complete.
Cut them out yourself or have the kids practice their scissor skills by helping you cut out the rewards before the snowman craft activity.
STEP #3: SOLVE THE TASKS TO EARN SNOWMAN CRAFT PIECES
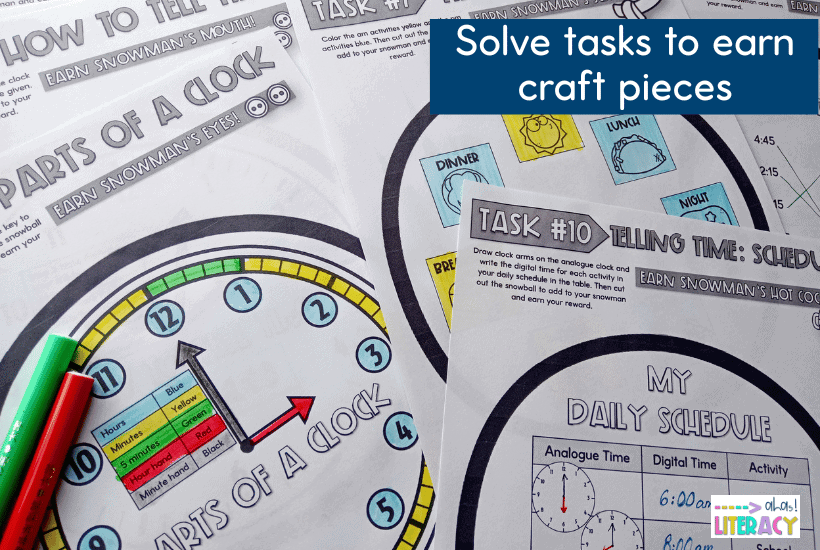
Now let the kids solve the math telling-time task worksheets to collect their reward craft pieces and put their snowman together. You will provide the base snowman head and body for them to glue their craft pieces on.
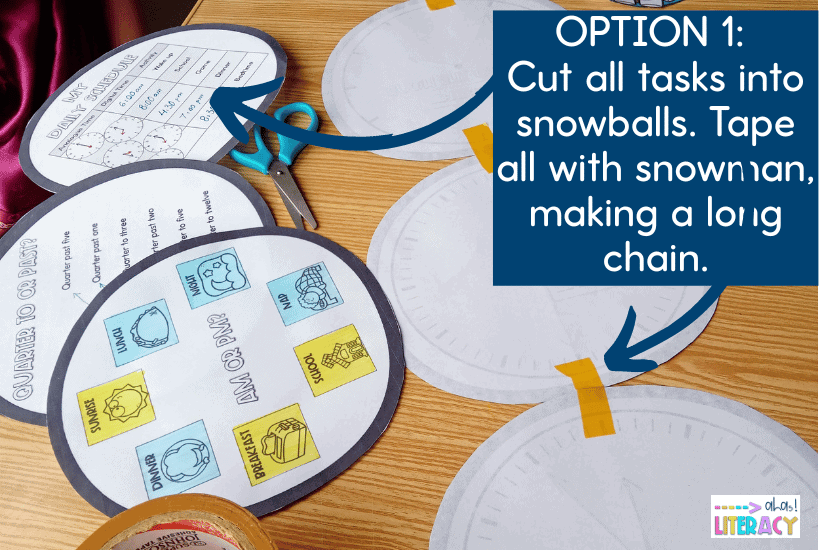
STEP #4: CUT OUT SNOWBALLS FROM TASK SHEETS
Now that the child has completed all tasks, collected the rewards, and prepared their snowman, it’s time to add the tasks snowballs to the basic snowman craft. . For this, have the kids cut out all snowballs from the task sheets.
STEP #5: COMBINE THE SNOWMAN-CRAFT AND THE MATH SNOWBALLS
The basic snowman is ready. Now the kids have to attach their math work to the snowman. For this they have cut out the snowballs that had the math tasks inside them.
Assembling both parts (snowman + math snowballs) together can be done in two ways.
OPTION 1: Make A Chain
Line all upside-down snowballs under the upside down snowman and tape them so they make a long vertical chain as shown in the image below. This makes a super long snowman.
The chain will come out too long!
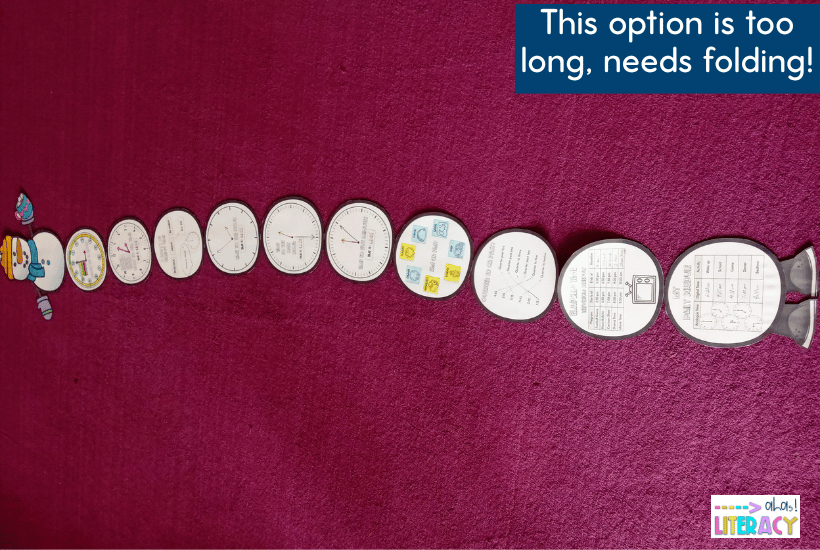
So, after making the chain of snowballs, you will fold your snowman chain to close it- for a lack of a better example, like a concertina?!
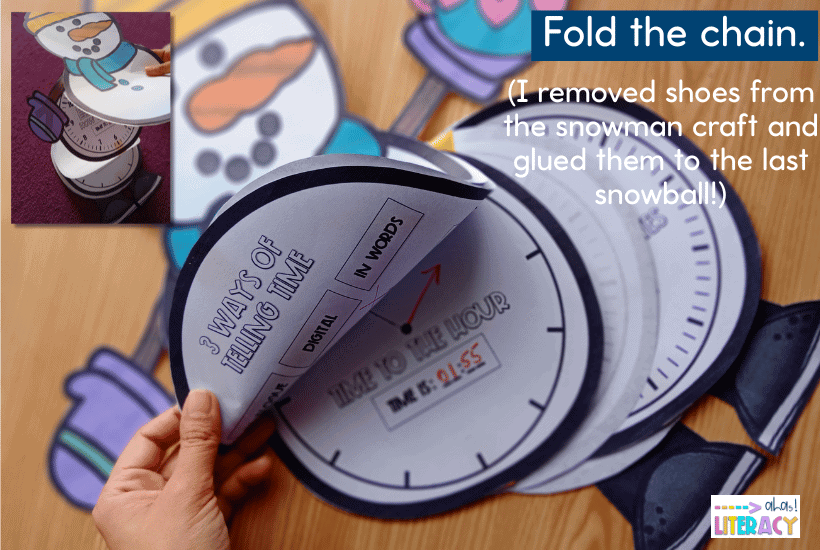
And your snowman winter craft with a fun math twist is ready!
OPTION 2: Make a Snowball Booklet
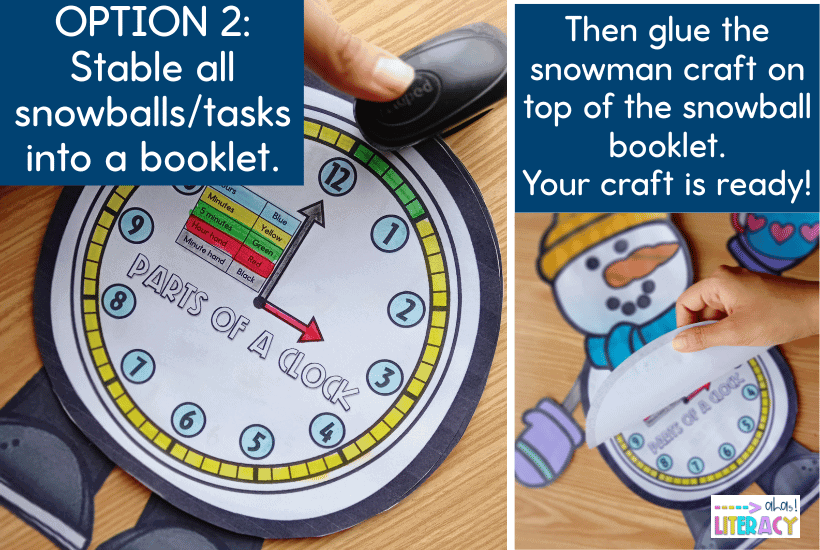
If you don’t want to make the snowball chain, you can place all the task snowballs together and staple them on the top to make a booklet. Then glue the basic snowman craft on top of this booklet.
This snowman math craft has a booklet on the snowman’s tummy.
I hope you enjoyed this! Sometimes it takes math to build a snowman craft!
Enjoyed this Build a Snowman Craft? Then you’re going to love these Differentiated Alphabet Crafts!
Save this post for later by pinning the image below to your favorite Pinterest board!